
How to Install and Calibrate an Interactive Whiteboard
author: toruitech
2025-10-13
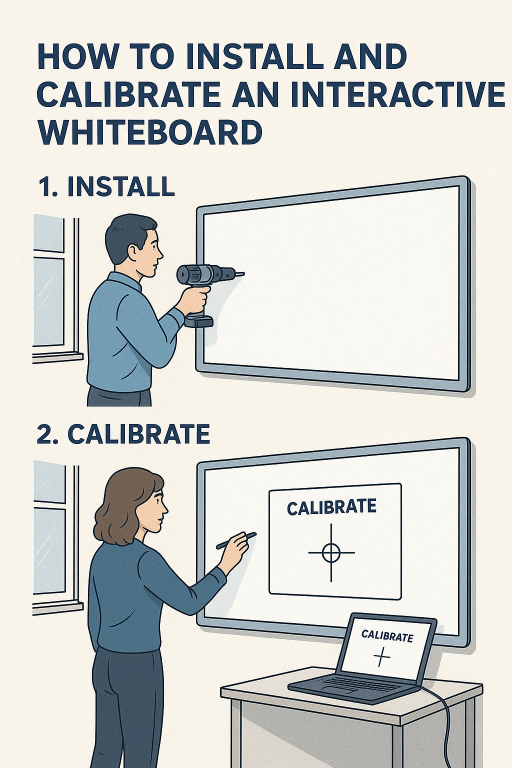
Installing and calibrating an interactive whiteboard (IWB) properly is essential to ensure smooth operation and accurate touch response during teaching or meetings. A well-installed whiteboard not only enhances user experience but also extends the lifespan of the device. Below is a step-by-step guide to help you install and calibrate your interactive whiteboard efficiently.
1. Choose the Right Location
Before installation, select a flat, stable wall surface with minimal sunlight glare. The board should be placed at an appropriate height so that both teachers and students (or presenters and audiences) can reach the writing area comfortably. Avoid placing it near strong light sources or air vents to prevent reflection or dust accumulation. Also, ensure there is enough space for the projector or camera system to function correctly.
2. Mount the Interactive Whiteboard
Most IWBs come with a wall-mounting bracket. Use a level tool to ensure the board is perfectly horizontal before drilling holes. Securely fix the mounting plate to the wall using screws and anchors that match the wall type. Once mounted, gently hang the whiteboard onto the bracket and tighten all screws to avoid any movement. If you are using a mobile stand, ensure the stand is stable and locked before use.
3. Connect the Hardware
Next, connect the whiteboard to the computer and projector (if applicable). Most modern IWBs use USB or HDMI cables for connection. Plug the cables firmly into their respective ports and power on all devices. If the whiteboard supports wireless connectivity, follow the manufacturer’s instructions to pair it with your computer or network.
4. Install the Software and Drivers
Before calibration, install the necessary drivers and interactive software provided by the manufacturer. This software enables touch recognition, annotation, and other smart functions. Follow the on-screen installation guide, and ensure that your operating system meets the required specifications.
5. Calibrate the Interactive Whiteboard
Calibration ensures the board accurately detects touch or pen movements. Open the calibration tool in the software and follow the instructions—usually, you will be asked to touch a series of points or crosshairs on the screen. Be precise when touching each point to ensure accurate alignment. Once calibration is complete, test the board by drawing lines or selecting icons to confirm correct touch mapping.
6. Test and Adjust Settings
After calibration, check brightness, contrast, and resolution settings to achieve the best visual performance. If the board supports multi-touch, test it with multiple users or gestures. Also, configure audio and network settings if your model includes built-in speakers or wireless sharing.
7. Regular Maintenance and Recalibration
Over time, environmental changes or hardware movement may affect calibration accuracy. It’s advisable to recalibrate the board every few months or whenever you notice touch misalignment. Keep the board surface clean with a soft, dry cloth, and avoid using abrasive materials or chemical cleaners.
Conclusion
Proper installation and calibration of an interactive whiteboard guarantee accurate performance, smooth interaction, and an engaging digital experience in classrooms and offices. Following these steps ensures your device operates efficiently, supports interactive learning, and delivers long-term reliability.
What Is an OPS Computer? A Complete Guide for Smart Displays and Interactive Whiteboards
Smart Board — Transforming Modern Learning and Collaboration
Related Article
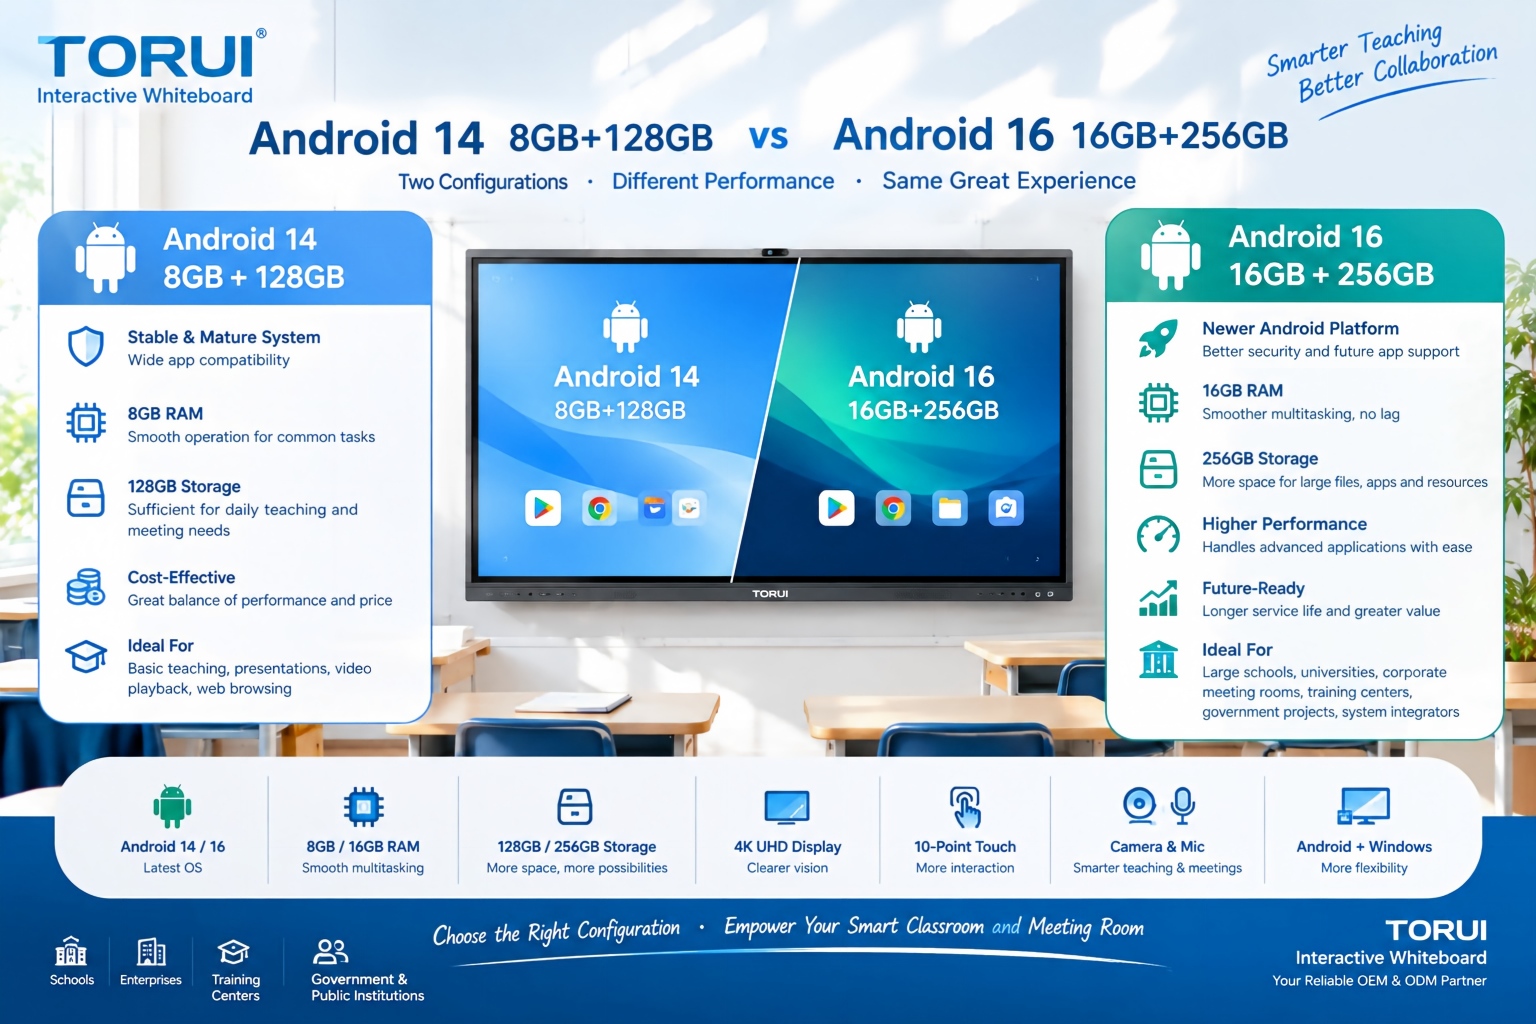
When choosing an interactive whiteboard for a school, training center, meeting room, or commercial project, the Android version and hardware configuration can significantly affect user experience. Two common configurations are Android 14 with 8GB RAM and 128GB storage and Android 16 with 16GB RAM and 256GB storage.
Android 14 8GB+128GB vs Android 16 16GB+256GB: Which Interactive Whiteboard Is Better?

Buying an interactive whiteboard is not simply about choosing the right screen size, resolution, or operating system. For B2B buyers, distributors, system integrators, schools, and corporate procurement teams, quality control is one of the most important factors affecting long-term reliability, user experience, warranty costs, and customer satisfaction.
Interactive Whiteboard Quality Control: What Should Buyers Check?
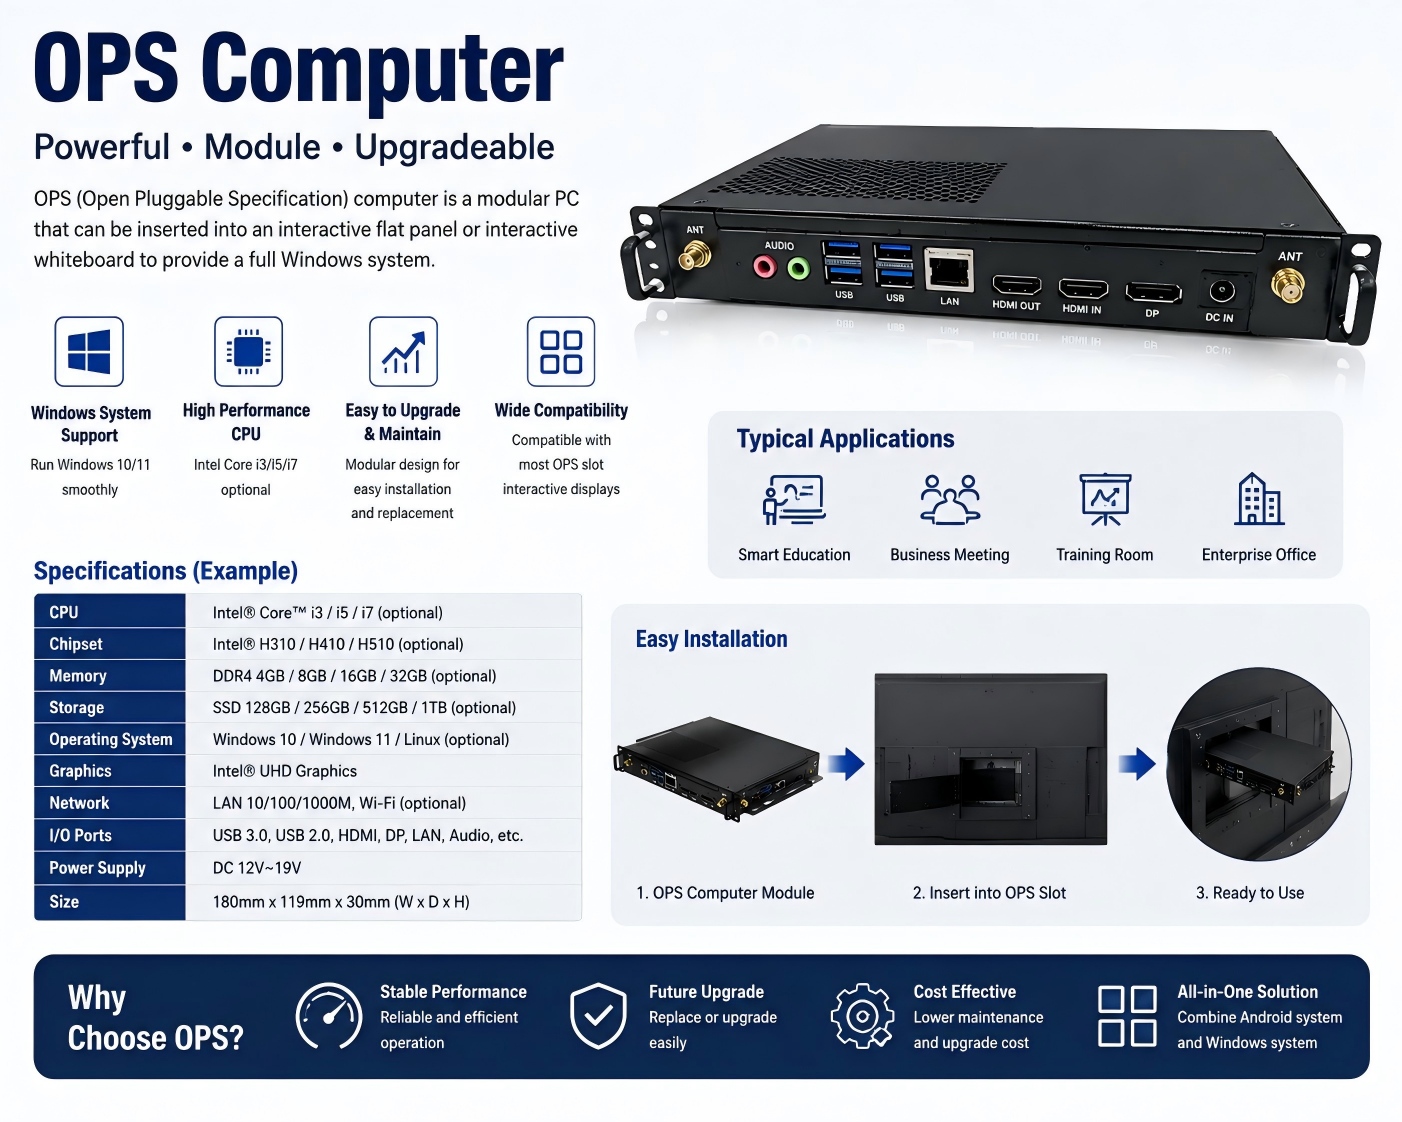
An OPS computer for an interactive whiteboard is a modular plug-in PC designed to add Windows-based computing power to an interactive display. OPS stands for Open Pluggable Specification, a standardized form factor originally developed for commercial interactive displays.
What Is an OPS Computer for Interactive Whiteboards?

Choosing the right chipset is an important decision when sourcing an interactive whiteboard for schools, conference rooms, training centers, government projects, or commercial applications. Among Rockchip platforms, RK3588 and RK3576 are two powerful options for modern Android interactive displays.
RK3588 vs RK3576: Which Chip Is Better for Interactive Whiteboards?